Minggu, 18 September 2016

Kursus Macro Excel | Membuat Aplikasi Inventaris Barang

Sampai saat ini, masih banyak Perusahaan atau Perkantoran yang melakukan kegiatan inventaris barang secara manual. Proses Inventaris barang yang dilakukan secara manual sebenarnya cukup membuang banyak waktu dan tenaga. Salah satu solusi untuk mengatasi permasalahan tersebut adalah menggunakan aplikasi inventaris barang dengan sistem komputerisasi. Anda akan diajarkan langkah demi langkah pembuatan aplikasi inventaris barang siap pakai menggunakan Macro Excel. Aplikasi Inventaris barang yang dibuat menggunakan Macro Excel dapat menyelesaikan proses inventaris barang dengan mudah dan cepat, karena hampir semuanya dikerjakan secara otomatis.
Materi Pelajaran Meliputi :
  1. Mengoptimalkan Fitur Macro Excel
    - Penggunaan Fitur Macro
    - Format File
    - Menonaktifkan Penyimpanan Workbook Otomatis
    - Keamanan Macro
    - Visual Basic Editor
    - Kode Macro
    - Objek
    - Properti
    - Method
    - Operator VBA
    - Variabel
    - Konstanta
    - Array
    - Tipe Data
    - Bekerja Dengan Range
    - Regional dan Language Options
  2. Menambah Interaktivitas Macro- Kotak Pesan
    - Kota Input
    - Built In Kotak Dialog
    - User Form
    - ActiveX Control
    - Form Control dan Shape
  3. Menyiapkan Worksheet Aplikasi- Worksheet DatabaseKategori
    - Worksheet DatabaseRuang
    - Worksheet DatabaseBarang
    - Worksheet DatabaseInventory
    - Worksheet DatabaseMutasi barang
    - Worksheet DatabaseOpnameBarang
  4. Membuat Form Aplikasi- Membuat Form Kategori Barang
    - Membuat Form Ruang
    - Membuat Form Barang
    - Membuat Form Pengadaan Barang
    - Membuat Form Mutasi Barang
    - Membuat Form Opname Barang
    - Membuat Form Laporan Barang
    - Membuat Form Laporan Inventory Barang
    - Membuat Form Laporan Mutasi Barang
    - Membuat Form Laporan Opname Barang
  5. Membuat Tampilan Utama Aplikasi- Desain Tampilan Utama Aplikasi
    - Menambahkan Macro
    - Menambahkan Tombol Kelompok Fitur
    - Menambahkan Tombol Kelompok Laporan
  6. Penggunaan Aplikasi Inventaris Barang- Menggunakan Form Kategori Barang
    - Menggunakan Form
    - Menggunakan Form Barang
    - Menggunakan Form Pengadaan Barang
    - Menggunakan Form Mutasi Barang
    - Menggunakan Form Opname Barang
    - Menggunakan Form Laporan Barang
    - Menggunakan Form Laporan Inventory Barang
    - Menggunakan Form Laporan Mutasi Barang
    - Menggunakan Form Laporan Opname Barang
FILE PROJECT DISEDIAKAN UNTUK BERLATIH DI RUMAH
Segera Daftarkan diri Anda!!!
Hubungi :

JOGJA MULTIMEDIA
JL MAGELANG KM 7,5 YOGYAKARTA
HP : 0877.3887.5400
WA : 0877.3887.5400
PIN BB : 5229B9B9


website : www.jogjacourse.com
website : www.jogjacourse.net
website : www.jogjalearn.com
website : www.jogjalearn.net


Sabtu, 17 September 2016

Kursus Adobe Photoshop CC 2015 | Teknik Editing Fotografi Intermediate

Kursus Editing Foto menggunakan Adobe Photoshop CC 2015, Anda akan diajarkan Teknik Teknik Editing Fotografi yang lebih mendalam, bagaimana cara meningkatkan kualitas Foto Anda dengan cara yang sangat efisien. Belajar meningkatkan akurasi warna gambar Foto dengan Level dan Curves. Belajar untuk bekerja dengan Mode Blending, Menerapkan Efek Warna Kreatif, Menggunakan Burn dan Dodge untuk meningkatkan Teknik Kontras Fotografi Klasik, Belajar mengoreksi Perspektif dan Distorsi Foto. Menciptakan Komposit Foto dan Panorama dan Bekerja dengan DLSR Video dalam Photoshop.
Topik Meliputi :
  • Mengoptimalkan alur kerja Anda dengan Adobe Bridge
  • Memperbaiki Warna Cast
  • Mempelajari Layer lebih Mendalam
  • Meningkatkan Edge Mask dan menggunakan Masking Shortcut
  • Membuat Making yang dilukis dengan tangan
  • Menemukan kekuatan mode blending
  • Mengganti dan berubah warna
  • Menggelapkan dengan Burning dan menguranginya dengan Dodge
  • Membuat gambar HDR
  • Menerapkan Smart Filter
  • Menggunakan Camera Raw sebagai Smart Filter
  • Bekerja dengan Blur Gallery efek
  • Mengoreksi distorsi lensa dan masalah perspektif
  • Menyisir beberapa gambar
  • Video editing
01 - Filtering and Finding Your Photos with Bridge
01 - Optimizing your workflow with shortcuts
02 - Rating, filtering, and finding the keepers more Quickly
03 - Using Full Screen mode to select the keepers
04 - Minimizing the interface to better evaluate the images
05 - Finding recently viewed folders and images
06 - Viewing subfolders and searching for specific images
02 - Organizing Your Photos with Bridge
01 - Moving and renaming folders
02 - Quickly renaming one or more images
03 - Duplicate, Copy, and Move
04 - Rejecting and deleting files
05 - Grouping images into collections and smart collections
06 - Using Review mode to create a collection of keepers
07 - Stacking images into groups
03 - Working Faster with Bridge
01 - Resizing images quickly with Image Processor
02 - Batch processing multiple files at once
03 - Creating a contact sheet
04 - Increasing Color Accuracy
01 - The importance of using daylight-balanced lightbulbs
02 - Correcting color casts using Camera Raw
03 - Correcting color casts using Levels and Curves
04 - Masking away color problems in specific areas
05 - Becoming an Expert with Layers
01 - Shortcuts for copying layers and layer style effects
02 - Changing fill and opacity
03 - Creating layer clipping masks
04 - Using layers to create a two-image layout
05 - Shortcuts for creating new layers
06 - Increasing the size of the Layers panel
07 - Selecting layers with more speed
08 - An advanced way to select and reorder layers
09 - Merging and flattening layers down
10 - Merging all layers to the top
06 - Making Better Selections and Masks
01 - Working with the Quick Selection tool
02 - Improving the edges of a mask and masking shortcuts
03 - Refining mask edges with the Maximum filter
04 - Using Color Range to build a mask
05 - Copying masks from one layer to another
07 - Creating Hand-Painted Masks
01 - Working with Quick Select
02 - Making gradient and hand-painted masks
03 - Creating smoother transitions with a gradient mask
04 - Making advanced tone corrections with hand-painted masks
05 - Selective sharpening with a hand-painted mask
06 - Removing small blemishes Quickly
08 - Discovering the Power of Blending Modes
01 - Introducing the magic of blend modes
02 - Using the Soft Light blending mode to increase visual impact
03 - Using multiple blending modes for the best results
04 - Improving underexposure
05 - Stacking blending modes together
06 - Create a saturated soft-glow effect
07 - Using Smart Filters to add a film-grain effect
08 - Using blending modes to remove white or black
09 - Creating a sepia-toned look with the Color blending mode
10 - Blending mode shortcuts
09 - Color Creativity
01 - Using the Replace Color adjustment
02 - Adjusting color with Replace Color, Hue-Saturation, and masking
03 - Becoming an expert with the Hue-Saturation controls
04 - Removing targeted colors with Hue-Saturation
05 - Making complicated color changes easy with Hue-Saturation
06 - Introducing how to change color with Selective Color
07 - Using Selective Color to enhance and change colors
08 - Using Color Balance to create vivid color
09 - Combining Color Balance and Curves to create dramatic color
10 - Master the Art of Burning and Dodging
01 - Introducing the Dodge and Burn tools
02 - Improving a black-and-white landscape photograph
03 - Brightening and darkening a color photograph
04 - Dodging and reducing shadows in a portrait
05 - Burning and dodging with the Brush
06 - Burning and dodging with gradient tools
11 - Creating an HDR Image
01 - Selecting the files and launching HDR Pro
02 - Finishing the image with Photoshop
12 - Applying a Creative Look with HDR Toning
01 - Creating an HDR effect with HDR Toning
02 - Achieving a high-contrast, edgy portrait look
03 - Creating a desaturated effect
13 - Increased Flexibility with Smart Filters
01 - Introducing Smart Filters
02 - Applying Smart Filters
03 - The advantages and disadvantages of using Smart Filters
14 - Using Camera Raw as a Smart Filter
01 - Enhancing your photographs using Camera Raw
02 - Correcting exposure and color with Camera Raw
03 - Fixing an overexposed sky with Camera Raw and masking
04 - Masking in Camera Raw adjustments
05 - Selective sharpening with Camera Raw and masks
15 - Applying Creative Effects with the Blur Gallery
01 - Changing focus with the Blur Gallery
02 - Applying multiple focus areas
03 - Using Tilt-Shift Blur on a portrait
04 - Becoming more advanced with Tilt-Shift Blur
05 - Creating a specialized effect with Field Blur
06 - Using Field Blur to sharpen focus area
07 - Adding spin motion with Spin Blur
08 - Getting started with the Path Blur filter
09 - Adding speed motion with Path Blur
16 - Making Perspective Corrections
01 - Using the Lens Correction filter
02 - Correcting difficult distortions with Lens Correction
03 - Using Upright in Camera Raw to easily correct distortion
04 - Digging deeper into the Camera Raw lens correction controls
05 - Fixing difficult issues easily with Camera Raw
06 - Correcting distortion in an architectural photograph
07 - Using the Camera Raw lens correction controls for creative results
08 - Using Puppet Warp to correct perspective
09 - Correcting distortion with Perspective Warp
17 - Combining Multiple Images Together
01 - Combining the best expressions in two group photographs
02 - Combining smaller elements from one frame to another
03 - Combining two photos with movement
04 - Using Photomerge to combine two images together
05 - Creating a panoramic photo from multiple frames
06 - Correcting distortion with the Adaptive Wide Angle filter
07 - Cropping, filling in the gaps, and making final panoramic adjustments
18 - Saving Your Photographs
01 - Exploring when to save as TIFF, PSD, or JPEG
02 - Preparing an image for the web
03 - Saving an optimized JPEG for the web
19 - Working with Your DSLR Video Files in Photoshop
01 - Opening up a video file in Photoshop
02 - Editing a video clip and adding type
03 - Adding and modifying transitions
04 - Using adjustment layers and adding an audio track
05 - Creating a project with multiple clips
06 - Adding cross-dissolves and fades, and creating custom shortcuts
07 - Customizing the workspace to review your Project
08 - Exporting your Project

FILE PROJECT DISEDIAKAN UNTUK BERLATIH DI RUMAH

Segera Daftarkan diri Anda!!!
Hubungi :

JOGJA MULTIMEDIA
JL MAGELANG KM 7,5 YOGYAKARTA
HP : 0877.3887.5400
WA : 0877.3887.5400
PIN BB : 5229B9B9

website : www.jogjacourse.com
website : www.jogjacourse.net
website : www.jogjalearn.com
website : www.jogjalearn.net


Kamis, 15 September 2016

Kursus Adobe Photoshop CC 2015 | Teknik Fundamental Fotografi

Adobe Photoshop memiliki banyak fitur canggih yang dirancang khusus untuk Fotografer dalam menciptakan foto foto yang lebih baik. Anda akan diajarkan cara mengubahnya untuk keuntungan Anda di dalam Dunia Pengeditan Fotografi. Diajarkan juga Trik Trik bagaimana meningkatkan dan memperbaiki foto Anda.
Topik meliputi:
  • Pengorganisasian dan penyaringan foto Anda di Adobe Bridge
  • Melakukan koreksi dasar di Camera Raw
  • Bekerja dengan meembuka beberapa dokumen sekaligus
  • Mengubah ukuran gambar tanpa degradasi
  • Recomposing gambar dengan cropping
  • Bekerja dengan Layer
  • Meningkatkan basic eksposur dan Tone
  • Membuat Selection yang tepat dan benar
  • Selektif mengoreksi dengan Masking
  • Menambahkan, mengubah, dan menghapus warna
  • Menajamkan dan mengurangi Noise
  • Membuat gambar yang sempurna untuk di cetak
01 - Strategies for Learning Photoshop
01 - Getting the most out of this course
02 - The importance of being relaxed and taking good notes
02 - Getting Started with Bridge
01 - Customizing the Bridge workspace
02 - Finding and organizing your images with folders and favorites
03 - Viewing your images at full screen and as a slideshow
04 - Rating, ranking, and filtering your photographs
05 - Opening your photos in Photoshop
03 - Setting Up Photoshop
01 - Setting up your color settings
02 - Customizing the interface
03 - Customizing the interface panels
04 - Choosing file-handling and autorecovery options
05 - Improving Photoshop performance
04 - Getting Started with Camera Raw
01 - What is Camera Raw
02- The Camera Raw interface
03 - Opening images in Camera Raw
04- Improving your images with the Basic controls
05 - Correcting color and white balance
06 - Creating vivid, saturated colors
07 - Creating a high-contrast black-and-white portrait
08 - Creating a compelling black-and-white landscape
09 - Previewing before and after
05 - Improving Your Photos with Camera Raw
01 - Correcting exposure and recovering highlights
02 - Cropping and straightening your photos
03 - Correcting lens distortions
04 - Retouching a portrait with the Spot Removal tool
05 - Retouching with the Spot Removal tool
06 - Cleaning up photographs with the Spot Removal tool
07 - Making selective adjustments
08 - Painting in improvements with the Adjustment Brush
09 - Improving the sky with the Graduated filter
10 - Adding light with the Radial filter
11 - Improving multiple images at one time
12 - Sharpening and reducing noise
13 - Saving and opening raw files in Photoshop
14 - Saving and opening raw files in Photoshop
06 - Getting Started with Photoshop
01 - Becoming familiar with the Photoshop interface
02 - Introducing the Tools panel
03 - Zooming in and out on your photographs
07 - Opening, Saving, and Viewing Your Photographs
01 - Opening, saving, and closing a photograph
02 - Working with multiple open documents
03 - Arranging and viewing multiple documents
08 - Understanding Digital Images and Resizing
01 - The relationship between pixels and image sizing
02 - Resizing an image to a smaller size
03 - Constraining proportions and resetting the Image Size dialog
04 - Using the resizing presets
05 - Quickly increasing your image size
06 - Effectively resizing images to a large size
09 - Cropping Your Photographs
01 - Recomposing and cropping your photographs
02 - Cropping your images to a specific size
03 - Cropping and making the horizon level
04 - Using the Marquee tool to crop
10 - Working with Layers
01 - Introducing layers
02 - Creating new layers
03 - Duplicating a layer to create a special effect
04 - Combining multiple images together as layers
05 - Creating a layout of multiple images
06 - Applying layer style effects
07 - Changing layer opacity
08 - Organizing and filtering layers
11 - Improving Basic Exposure and Tone
01 - Adding brightness and contrast
02 - Fixing an image that is too bright
03 - Brightening the shadow areas of a photo
04 - Correcting overexposure
12 - Making Selections and Adjustments
01 - Selecting with the Elliptical Marquee tool
02 - Working with the Rectangular Marquee tool
03 - Using the Polygonal Lasso tool
04 - Adding to or subtracting from your selection
05 - Using the Magnetic Lasso tool
06 - Working with the Quick Select tool
07 - Removing the background with Quick Select
08 - Using Color Range
13 - Advanced Control with Masking
01 - Introducing masks
02 - Building and editing a mask
03 - Removing a person from the background with masking
04 - Removing color with a mask
05 - Selectively sharpening an area of your photograph
06 - Building a selection with Focus Area
07 - Using Focus Area to modify color
14 - Improving Exposure with Adjustment Layers
01 - Automatically improving your images
02 - Making custom levels adjustments
03 - Fine-tuning an image with Curves
15 - Adding, Changing, and Removing Color with Adjustment Layers
01 - Changing color with Hue-Saturation
02 - Increasing saturation and color variety with Vibrance
03 - Using Color Balance to create vivid color
04 - Making subtle color adjustments with Photo Filter
05 - Creating a color effect with Curves
06 - Converting to black and white
16 - Applying Photographic Effects with Filters
01 - Adding lens flare
02 - Lighting your photographs with Lighting Effects
03 - Changing focus with the Blur Gallery
04 - Using Camera Raw as a filter to create a unique look
17 - Sharpening and Reducing Noise
01 - Reducing unwanted noise with Camera Raw and Photoshop
02 - Sharpening and perfecting your photos with Smart Sharpen
03 - Selectively sharpening an area of your photograph
18 - Essential Image Retouching Techniques
01 - Using Content-Aware Fill to remove distractions
02 - Using repeated Content-Aware Fill commands to clean up an image
03 - Working with the Patch tool and Content-Aware Move
04 - Introducing the Clone Stamp tool and Healing Brushes
05 - Retouching an image with the Clone Stamp
06 - Working with Spot Healing and Healing Brushes
07 - Removing skin blemishes with Spot Healing
08 - Reducing wrinkles and shadows under the eyes
09 - Whitening teeth with selection and adjustment layers
10 - Changing shape with Liquify
11 - Adjusting facial features with Liquify
19 - Making Picture-Perfect Prints
01 - Getting ready to print- Resize and sharpen
02 - Selecting your printer and paper size
03 - Choosing color management and printer settings
FILE PROJECT DISEDIAKAN UNTUK BERLATIH DI RUMAH
Segera Daftarkan diri Anda!!!
Hubungi :

JOGJA MULTIMEDIA
JL MAGELANG KM 7,5 YOGYAKARTA
HP : 0877.3887.5400
WA : 0877.3887.5400
PIN BB : 5229B9B9


website : www.jogjacourse.com
website : www.jogjacourse.net
website : www.jogjalearn.com
website : www.jogjalearn.net


Jumat, 09 September 2016

Kursus Adobe Illustrator CC 2015 | Desain Logo Fundamental

Logo sangatlah penting bagi Identitas sebuah Perusahaan, Oleh karena itu kita tidak bisa asal untuk mendesain sebuah logo Perusahaan, Bagi Anda yang ingin belajar mendesain Logo dengan menggunakan Adobe Illustrator kami menyediakan kursusnya,  Anda akan diajarkan mendesain berbagai macam Logo dengan menggunakan Tool tools yang ada di Adobe Illustrator secara cepat dan benar.
Topik Meliputi :
  • Menggambar desain Anda
  • Memilih gaya logo
  • Membangun logo
  • Menciptakan desain modular
  • Membangun merek warna dan kontinuitas visual
  • Iconifying bentuk kompleks
  • Menambahkan dimensi ke motif
  • Menggunakan ruang negatif
  • Menyampaikan file logo dan panduan style
01 - Solid Creative Foundation
01 - Drawing your design
02 - Selecting an appropriate style
03 - Ideation tactics
02 - Base Vector Craftsmanship
01 - The clockwork method
02 - The shape building method
03 - Creating precisely with smart guides
03 - Brand Identity Formatting
01 - Modular logo designs
02 - Encapsulated logo designs
03 - Logotypes
04 - Establishing brand colors
05 - Creating brand systems
04 - Logo Design and Build Methodology
01 - Visual deduction
02 - Establishing visual continuity
03 - Creating fat-line logos
04 - Detailing with subtle rounds
05 - Symmetric and asymmetric compositions
06 - Alignment methods
07 - Iconifying complex shapes
08 - Adding dimension to flat motifs
09 - Type exploration for logos
10 - Monogram overlaps
11 - Negative space logo Concepts
12 - Using isolation mode
13 - Extend path editing
14 - Creative risk taking
05 - Delivering Final Art Files
01 - Creating black and white logo iterations
02 - Building reverse logo art
03 - Production-ready files
04 - Simple style guides
05 - Organizing logo files
FILE PROJECT DISEDIAKAN UNTUK BERLATIH DI RUMAH
Daftarkan diri Anda!!!
Segera Hub :Jogja Multimedia
Jl. Magelang KM 7,5 Yogyakarta
HP : 0877.3887.5400
WA : 0877.3887.5400

Pin BB : 5229B9B9
website : www.jogjacourse.com
website : www.jogjacourse.net
website : www.jogjalearn.com
website : www.jogjalearn.net


Kamis, 08 September 2016

Kursus Adobe Illustrator CC 2015 | Adobe Pen Tool Fundamental

Kursus ini Belajar menggunakan Pen Tool untuk menggambar Garis, Kurva, Bentuk Objek lain secara Cepat dan Tepat. Anda akan diajarkan Rahasia Trik Trik menggunakan Pen Tool beserta Shortcutnya yang jarang diketahui oleh banyak orang. Sehingga Pekerjaan Menggambar Anda akan lebih cepat selesai.
Topik Meliputi :
  • Memahami bagaimana menangani pekerjaan dengan Anchorpoint, segmen, dan kontrol handle
  • Menambah dan menghapus anchor poin 
  • Bekerja dengan Smooth Point dan Cusp Points
  • Memilih dan membatalkan pilihan dengan Arrow Tool
  • Menggambar jalur berbasis vektor
  • Menghubungkan jalur terbuka
  • Poin reposisi dan segmen menggambar
  • Menyisipkan dan menghapus poin dengan cepat
  • Mengkonversi beberapa poin dengan satu klik
01 - The Building Blocks of Path Outlines
01 - Meet the Black and White Arrow tools
02 - Anchor points, segments, and control handles
03 - The three kinds of anchor points
02 - Using Anchor Points and Control Handles01 - Working with corner points
02 - Adding and deleting anchor points
03 - Working with smooth points
04 - Adding some random wiggle
05 - Working with cusp points
06 - Creating cusps by subtracting shapes
07 - Creating cusp points with the White Arrow
08 - Turning a circle into a droplet

03 - The Many Ways to Use the Arrow Tools 01 - Getting to the Arrow tools on the fly
02 - Selecting and deselecting
03 - Selecting inside groups and compound objects
04 - Special ways to drag
05 - Creating cusps in Illustrator, InDesign, and Photoshop

04 - Meet the Pen Tool01 - Introducing the Pen and precise cursors
02 - Communicating with the Pen tool
03 - Extending an active path outline
04 - Drawing vector-based paths in Photoshop
05 - Completing an open path outline
06 - Extending a dormant path outline
07 - Connecting two open paths

05 - Advanced Pen Tool Tricks 01 - Undoing an anchor point versus deleting it
02 - Repositioning points and segments as you draw
03 - Real-world moving and nudging
04 - Inserting and deleting points on the fly
05 - Real-world inserting and deleting
06 - The spacebar versus very small drags
07 - Four unrelated Shift key tricks
08 - Converting points with the Pen tool
09 - Converting multiple points with a single click
FILE PROJECT DISEDIAKAN UNTUK BERLATIH DI RUMAH

Segera Hub :Jogja Multimedia
Jl. Magelang KM 7,5 Yogyakarta
HP : 0877.3887.5400
WA : 0877.3887.5400

Pin BB : 5229B9B9
website : www.jogjacourse.com
website : www.jogjacourse.net
website : www.jogjalearn.com
website : www.jogjalearn.net


Senin, 05 September 2016

Kursus Adobe After Effects | Animasi Typography Teks

Kursus After Effects ini belajar khusus tentang Animasi Teks, Anda akan diajarkan menciptakan Animasi Teks dari yang paling sederhana sampai yang paling menarik, Belajar membuat Animasi Teks menjadi lebih hidup, Belajar juga tentang Preset Teks Effects, Menghidupkan Animasi Kamera.

Topik Meliputi :
01 – Understanding the Emotions of Animation
02 – Essential Aesthetic and Technical Principles
03 – Working with Text Animation Presets
04 – Creating High-Energy Animation
05 –  Creating Clean, Simple, and Smooth animation
06 – Animating Multiple Lines of Type


Segera Hub :Jogja Multimedia
Jl. Magelang KM 7,5 Yogyakarta
HP : 0877.3887.5400
WA : 0877.3887.5400

Pin BB : 5229B9B9
website : www.jogjacourse.com
website : www.jogjacourse.net
website : www.jogjalearn.com
website : www.jogjalearn.net

Selasa, 19 Januari 2016

Kursus Komputer Adobe Illustrator Dengan Materi Berkualitas Di Jogjakarta

Kursus Adobe Illustrator
 
 
Membuat ilustrasi kini tak hanya dapat dilakukan melalui proses manual namun dapat pula dilakukan dengan komputer yaitu dengan menggunakan software adobe ilustrator ini. Semua fasilitas yang ada dalam Adobe Ilustrator ini telah dibuat sedemikian rupa untuk mempermudah kita dalam membuat sebuah ilustrasi dari yang sederhana sampai yang membutuhkan kompleksitas tinggi. namun tentunya yang paling penting dalam pembuatan sebuah desain adalah kreatifitas si desainer itu sendiri.  Dalam kursus komputer adobe illustrator, Anda akan diajak untuk menemukan ide-ide kreatif Anda.

KURSUS PRIVAT DESAIN GRAFIS ADOBE ILLUSTRATOR DENGAN MATERI BERKUALITAS DI KURSUS KOMPUTER YOGYAKARTA

Kursus Adobe Illustrator Jogja 01

0 - Introduction
Welcome to Adobe Illustrator
Kursus Adobe Illustrator Jogja 02

1 - Making a Document
1-1 Opening from the Windows desktop
1-2 Opening from the Macintosh Finder
1-3 Creating a new document
1-4 Advanced document controls
1-5 Modifying your document
1-6 Saving changes
1-7 Closing all open documents
Kursus Adobe Illustrator Jogja 03

2 - Working with Artboards
2-1 Pages of any size, at any angle
2-2 Moving and modifying artboards
2-3 Changing the size and shape of artboards
2-4 Creating and copying artboards
2-5 Introducing the Artboard panel
2-6 Auto-arranging artboards
2-7 Artboards and rulers
Kursus Adobe Illustrator Jogja 04

3 - Getting Around
3-1 Navigating your artwork
3-2 The dark vs. the light interface
3-3 Zooming a document and its artboards
3-4 Honing in a specific detail
3-5 Scrolling (or panning) a document
3-6 Using the Page Up and Page Down keys
3-7 Navigating numerically and from a panel
3-8 Working with multiple open documents
3-9 Panels and workspaces
3-10 Cycling through screen modes
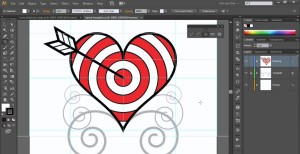
Kursus Adobe Illustrator Jogja 05

4 - Making Line Art
4-1 Now, we draw
4-2 Meet the line tools
4-3 Creating custom guides
4-4 Drawing a heart with the Arc tool
4-5 Adjusting control handles
4-6 Reflecting and completing a shape
4-7 Drawing a target with the Polar Grid tool
4-8 Pasting one shape inside another
4-9 Drawing an arrow with the Line tool
4-10 Rotating, filling, and stacking
4-11 Using the Spiral tool
4-12 Tracing existing spirals

Kursus Adobe Illustrator Jogja 06

5 - Drawing Geometric Shapes
5-1 And now, we draw better
5-2 Meet the shape tools
5-3 Using the Ellipse tool
5-4 Creating compound paths
5-5 Drawing a multi-point star
5-6 Adding and aligning a center point
5-7 Drawing rounded rectangles
5-8 Aligning to a split location
5-9 Reflecting across an axis
5-10 Modifying the constraint axes
5-11 Turning a triangle into an arrowhead
5-12 Using the Flare tool
5-13 Using the top-secret tilde key trick

Kursus Adobe Illustrator Jogja 07

6 - Tracing an Image
6-1 Auto-tracing in Illustrator
6-2 Opening an image to embed it
6-3 Placing an image to create a dynamic link
6-4 Auto-tracing and resolution
6-5 Adjusting layer previews
6-6 Cleaning up with the Threshold option
6-7 More clean-up with the Noise option
6-8 Expanding and simplifying traced paths
6-9 Flipping and fusing shapes
6-10 Scaling resolution-independent vectors

Kursus Adobe Illustrator Jogja 08

7 - Scaling and Rotating
7-1 The realm of transformations
7-2 Creating a tracing template
7-3 Drawing a diamond with the Polygon tool
7-4 Dragging and duplicating
7-5 Using the Scale tool
7-6 Scaling along a constraint axis
7-7 Using the Rotate tool
7-8 Rotating and duplicating
7-9 Group, stack, and organize

Kursus Adobe Illustrator Jogja 09

8 - Painting Freeform Shapes
8-1 The best tools for painting
8-2 Painting closed path outlines
8-3 Erasing and painting selected paths
8-4 Reassigning keyboard shortcuts
8-5 Painting in the Outline mode
8-6 Using the Shape Builder tool
8-7 Subtracting with the Shape Builder
8-8 Assigning colors with the Shape Builder
8-9 Reflecting across an angled axis
8-10 Cleaning up Shape Builder leftovers
8-11 Establishing hierarchy with groups
8-12 Working in the Group Isolation mode
8-13 Simulating beveled edges
8-14 Creating a network of interlocking paths

Kursus Adobe Illustrator Jogja 10

9 - Working with Type
9-1 Text formatting at its best
9-2 Creating page margins
9-3 Placing and flowing text
9-4 Selecting words and lines of type
9-5 Working with point text
9-6 Previewing and assigning fonts
9-7 Incrementally adjusting type size
9-8 Leading and paragraph indent
9-9 Pair-kerning and tracking
9-10 Hanging indents and paragraph spacing
9-11 Creating and applying paragraph styles
9-13 Using the Glyphs panel
9-14 Spell-checking your text

Kursus Adobe Illustrator Jogja 11

10 - Using the Pen Tool
10-1 The tool that can drawing anything
10-2 Drawing straight-sided paths
10-3 Editing a path as you draw it
10-4 Inserting and removing anchor points
10-5 Faking simple spline curves
10-6 Adding curvature with Round Corners
10-7 Introducing control handles
10-8 Drawing perfectly smooth outlines
10-9 Tracing a freeform, curving path
10-10 Three ways to make a cusp point
10-11 Converting an existing anchor point
10-12 Drawing inside or behind other paths
10-13 Copying and repurposing segments
10-14 Copying and transforming entire layers

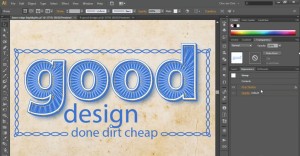
Kursus Adobe Illustrator 1

Kursus Adobe Illustrator Jogja 12

11 - Layers and Groups
11-1 Welcome to One-on-One
11-2 Creating and moving objects onto layers
11-3 Creating and using sublayers
11-4 Creating 3D type as a group
11-5 Selecting and working inside groups
11-6 Creating clipping groups
11-7 Working in an isolation mode
11-8 Applying effects to groups and layers

Kursus Adobe Illustrator Jogja 13

 12 - Swatches and Stacking Order

12-1 How swatches and stacking work
12-2 Multiple views and power duplication
12-3 Lifting a color and creating a swatch
12-4 Creating and using global swatches
12-5 Deleting, adding, and managing swatches
12-6 Assigning and eyedropping colors
12-7 Assigning colors to paths inside groups
12-8 Adjusting the stacking order
12-9 Selecting down a stack of paths
12-10 Pasting in front and in back
12-11 Combining multiple fills
12-12 Trapping your art with rich blacks
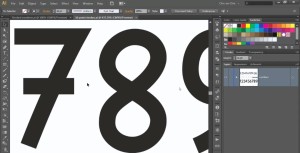
Kursus Adobe Illustrator Jogja 15

13 - Strokes, Dashes, and Arrows
13-1 The rich world of strokes
13-2 Introducing the Stroke panel
13-3 Caps, joins, and miter limits
13-4 Dashes and arrowheads
13-5 Using the Width tool to vary the line weight
13-6 Adjusting the width of closed path outlines
13-7 Making a coupon border with scissors
13-8 Combining dashes with round caps
13-9 Making an official money-like type effect
13-10 Creating a wavy, engraving-line background
13-11 Masking a pattern inside a background
13-12 Creating tapering rules (with inset strokes)

Kursus Adobe Illustrator Jogja 16

14 - Gradients and the Gradient Tool
14-1. How gradients work
14-2 Assigning and modifying a gradient fill
14-3 Using the Gradient tool and annotator
14-4 Editing multiple gradients at a time
14-5 Establishing symmetrical gradients
14-6 Creating a radial gradient
14-7 Adjusting the midpoint skew
14-8 Mixing gradients with blend modes
14-9 Adding transparency to a gradient
14-10 Applying and editing dynamic effects
14-11 Assigning a gradient to editable text
14-12 Editing text that includes dynamic effects
14-13 The new gradient stroke options

Kursus Adobe Illustrator Jogja 17

15 - Seamlessly Repeating Patterns
15-1 The reinvention of tile patterns
15-2 Drawing a linear spiral with the Polar Grid tool
15-3 Assembling the raw ingredients for a pattern
15-4 Using the new Pattern Generator
15-5 The new tile types. Brick and Hex
15-6 The Size Tile to Art and Overlap options
15-7 Creating a new pattern based on an existing one
15-8 Applying patterns to strokes and text
15-9 Moving and transforming patterns
15-10 Fixing problem legacy patterns

Kursus Adobe Illustrator Jogja 18

16 - Align and Distribute
16-1 How alignment and distribution work
16-2 Snapping one anchor point to another
16-3 Aligning a group to the artboard
16-4 Distributing objects across the artboard
16-5 Aligning to a fixed key object
16-6 Distributing by a specified amount of space
16-7 Using the Align options to move objects
16-8 Adding an extruded edge effect
16-9 Optically aligning objects
16-10 Adding a credible 3D cast shadow
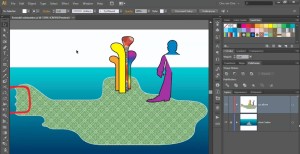
Kursus Adobe Illustrator Jogja 19

17 - Pathfinder Operations
17-1 Combining simple shapes to make complex ones
17-2 Understanding all ten Pathfinder options
17-3 Unite closed paths, join open ones
17-4 Creating a dynamic compound shape
17-5 Adding to a compound shape
17-6 Variable width, Outline Stroke, and Unite
17-7 Painting rough leaves with the Blob Brush
17-8 Creating credible leaves with dynamic effects
17-9 Contouring with the Blob Brush and Eraser
17-10 Filling in branches with the Blob Brush
17-11 Merging layers and uniting paths
17-12 Using Divide and Minus Back
17-13 Nesting one compound shape inside another

Kursus Adobe Illustrator Jogja 20

18 - Live Paint and Interlocking Paths
18-1 Filling and stroking overlapping areas
18-2 Introducing Live Paint
18-3 Stroking with the Live Paint Bucket
18-4 Using the Live Paint Selection tool
18-5 Adding paths to a Live Paint object
18-6 Building a classic, interwoven Celtic knot
18-7 Weaving one path outline into another
18-8 Creating a path that overlaps itself
18-9 Painting a path that overlaps itself
18-10 Combining gradients and depth with Live Paint
18-11 Swapping out Live Paint fills and strokes
18-12 Casting shadows inside a Live Paint object
Kursus Adobe Illustrator Jogja 21

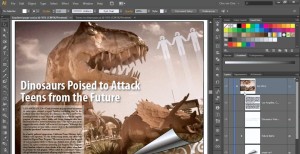
19 - Placing Photoshop Images
19-1 Illustrator and the photographic image
19-2 Placing a photograph into your artwork
19-3 Dragging and dropping photos into Illustrator
19-4 Working with linked images
19-5 Scaling and cropping inside a bounding box
19-6 Cropping an image inside a clipping mask
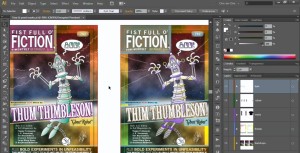
19-7 Adding a border to an image, and colorizing
19-8 Creating a trendy gradient page curl
19-9 Placing a Photoshop image, with transparency
19-10 Linking vs. embedding images
19-11 Unembed and Package (Creative Cloud only)
Kursus Adobe Illustrator Jogja 22

20 - Printing a Document
20-1 Local and commercial printing
20-2 Convert all text to path outlines
20-3 Setting the trim size and bleed
20-4 Creating automatic and custom crop marks
20-5 Introducing and applying Pantone spot colors
20-6 Using the Separations Preview panel
20-7 Troubleshoot, overprint, and trapping
20-8 Printing. The General options
20-9 Placement, scale, and tiling
20-10 Adding trim and printer's marks
20-11 PostScript and color separations
20-12 The esoteric advanced printing options

Kursus Adobe Illustrator Jogja 23

21 - Saving for the Web (and PowerPoint)
21-1 Making art for the Internet
21-2 Aligning your artwork to the pixel grid
21-3 Optimizing editable text for the web
21-4  Increasing the resolution of your web art
21-5 Saving a continuous-tone JPEG image
21-6 Optimizing your art to a specific file size
21-7 Saving high-contrast, low-color art to GIF
21-8 The more flexible PNG format
21-9 Saving PNG-24 for the web or PowerPoint

Kursus Adobe Illustrator 2

Kursus Adobe Illustrator Jogja 24

22 - Shortcuts and Settings
22-1 Welcome to One-on-One
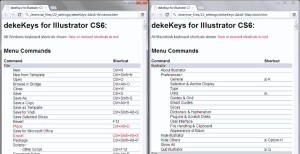
22-2 Introducing my custom keyboard shortcuts
22-3 Installing my dekeKeys shortcuts on Windows
22-4 Installing my dekeKeys shortcuts on the Mac
22-5 Remapping your Macintosh OS shortcuts
22-6 Adjusting a few key Preferences settings
22-7 Understanding the color-managed workflow
22-8 Establishing the optimal Color Settings

Kursus Adobe Illustrator Jogja 25

23 - Blends and Masks
23-1 Illustrator's oldest dynamic functions
23-2 Creating a multicolor blend
23-3 Establishing a clipping mask
23-4 Reinstating the colors of a clipping path
23-5 Editing individual blended paths
23-6 Adjusting the number of steps in a blend
23-7 Fixing problems with the Blend tool
23-8 Blending different levels of opacity
23-9 Editing the spine of a blend
23-10 Adding a custom spine to any blend
23-11Advanced blending and masking techniques
23-12 Blending between entire groups
23-13 Adjusting the speed of a blend
23-14 Rotating objects in 3D space (Photoshop Extended only)
Kursus Adobe Illustrator Jogja 26

24 - Logos and Specialty Text
24-1 Illustrator's logo-making features
24-2 Customizing a single character of type
24-3 Combining a letterform with a path outline
24-4 Creating logo type along an open path
24-5 Creating logo type around a closed circle
24-6 Vertical alignment, orientation, and spacing
24-7 Warping logo type around a circle
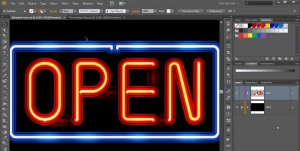
24-8 Creating a classic neon type effect
24-9 Adding random neon brightness fluctuations
24-10 Creating neon block outs between letters
24-11 Adding neon blur and bokeh in Photoshop

Kursus Adobe Illustrator Jogja 27

25 - The Color Guide Panel
25-1 Generating colors using harmony rules
25-2 Introducing the Color Guide panel
25-3 The 23 color harmony rules, diagrammed
25-4 Mixing and matching color harmonies
25-5 Color groups and custom harmony rules
25-6 Working in the Edit Colors dialog box
25-7 Expanding on an existing harmony rule
25-8 Constraining colors to a predefined library

Kursus Adobe Illustrator Jogja 28

26 - Recoloring Artwork
26-1 Changing lots of colors all at once
26-2 Introducing the Recolor Artwork command
26-3 Recoloring with the help of swatch groups
26-4 Changing the color-assignment order
26-5 Reducing the number of colors in your art
26-6 Applying tints and shades of a single swatch
26-7 Recoloring artwork that contains gradients
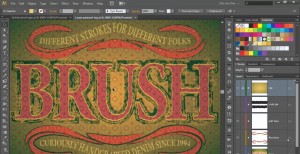
Kursus Adobe Illustrator Jogja 29

27 - Calligraphic, Scatter, and Art Brushes
27-1 Painting with path outlines
27-2 Introducing the Brushes panel
27-3 Applying and editing a calligraphic brush
27-4 Applying and scaling an art brush
27-5 Applying and editing a scatter brush
27-6 Formatting and scaling brushed text
27-7 Designing a custom art brush
27-8 Creating (or replacing) an art brush
27-9 Refining a brush to fit ends and corners
27-10 Expanding, filling, and stroking a brush
27-11 Type on a path vs. text as an art brush
27-12 Distorting text with the Width tool
27-13 Infusing your artwork with a tile pattern
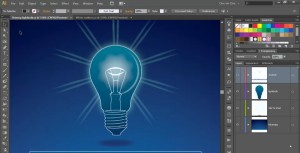
Kursus Adobe Illustrator Jogja 30

28 - Transparency and Blend Modes
28-1 The many forms of transparency
28-2 Creating translucency with the Opacity value
28-3 Darken, Multiply, and Color Burn
28-4 Lighten, Screen, and Color Dodge
28-5 Overlay, Soft Light, Hard Light, Difference, and Exclusion
28-6 Hue, Saturation, Color, and Luminosity
28-7 Combining the effects of multiple blend modes
28-8 Isolating blending and Knockout Group
28-9 Combining blend modes with dynamic effects
28-10 Exporting transparency from Illustrator
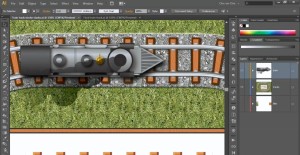
Kursus Adobe Illustrator Jogja 31

29 - The Appearance Panel
29-1 The Layers panel for dynamic attributes
29-2 Applying attributes in the Appearance panel
29-3 Creating depth using translucent strokes
29-4 Adding, layering, and offsetting strokes
29-5 Duplicating entire groups of attributes
29-6 Turning stacked strokes into editable paths
29-7 Simplifying a multi-stroke effect
29-8 Applying the Convert to Shape effect
29-9 Adding aligned patterns and shadows
29-10 Drawing with arrowheads and angled strokes
29-11 Employing overlapping gradient strokes
29-12 Drawing circular stroke elements
29-13 Outlining an entire multi-stroke effect
29-14 Creating seamless wood grain in Photoshop
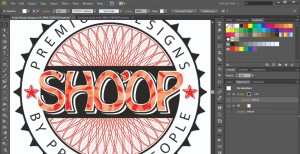
Kursus Adobe Illustrator Jogja 32

30 - Dynamic Effects
30-1 The best features in Illustrator
30-2 Repeating a series of transformations
30-3 Adjusting and updating a dynamic effect
30-4 Applying a stroke to an entire layer
30-5 Improving the performance of drop shadows
30-6 Applying a single effect multiple times
30-7 Creating an intricate Spirograph pattern
30-8 Adding scalloped edges with Pucker & Bloat
30-9 Applying a dynamic Pathfinder to a layer
30-10 Creating beveled ornaments
30-11 Creating a sculptural type effect
30-12 Subtracting editable text from a path
30-13 Editing text inside a dynamic effect
Kursus Adobe Illustrator Jogja 33

31 - Graphic Styles
31-1 Never remember anything again, ever
31-2 The pixel-based Effect Gallery
31-3 Copying effects from one layer to another
31-4 Introducing the Graphic Styles panel
31-5 Correcting previews in the Effect Gallery
31-6 Adjusting the resolution of your effects
31-7 Combining and saving graphic styles
Kursus Adobe Illustrator Jogja 34

32 - Combining the Powers of Illustrator and Photoshop
32-1 Two powerful graphics programs combine forces
32-2 Creating a perfectly centered star shape
32-3 Precisely scaling concentric circles
32-4 Adding reflective highlights with the Flare tool
32-5 Two ways to rasterize vector art for Photoshop
32-6 Importing vector art as a Smart Object
32-7 Creating a lens flare effect in Photoshop
32-8 Photographic texture and brushed highlights
32-9 Modifying a vector Smart Object in Illustrator
32-10 Converting Illustrator paths to shape layers
32-11 Assign layer effects to native shape layers
32-12 Completing a work of photorealistic art

Kursus Adobe Illustrator 3

Kursus Adobe Illustrator Jogja 35

33 - Using Smart Guides
33-1 Welcome to One-on-One
33-2 Setting up angular construction guides
33-3 Shaving off miter joins and projecting caps
33-4 Precisely aligning angled logo artwork
33-5 Covering up gaps and seams in your logo
33-6 Creating ornaments based on miter joins
33-7 Hand-drawing letters as stroked paths
33-8 Kerning and clipping hand-drawn type
Kursus Adobe Illustrator Jogja 36

34 - Working with Symbols
34-1 The benefits of using symbols
34-2 How symbols and instances work
34-3 Creating and naming symbols
34-4 Introducing 9-slice scaling
34-5 Customizing the effects of 9-slice scaling
34-6 Acquiring, trading, and previewing symbols
34-7 Duplicating and replacing symbol instances
34-8 Using symbols to simulate master pages
34-9 Advanced symbol modifications
Kursus Adobe Illustrator Jogja 37

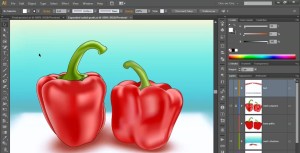
35 - Gradient Mesh
35-1 Shading objects with Gradient Mesh
35-2 Creating a gradient mesh
35-3 Adding and deleting lines with the Mesh tool
35-4 Assigning colors to mesh points
35-5 Finessing colors to add depth and shading
35-6 Creating a gradient with the Mesh tool
35-7 Wrapping gradients around circles
35-8 Working with slender, bending shapes
35-9 Creating soft and sharp transitions
35-10 Converting a linear gradient to a mesh
35-11 Converting a radial gradient to a mesh
35-12 Using gradients to cast shadows

Kursus Adobe Illustrator Jogja 38

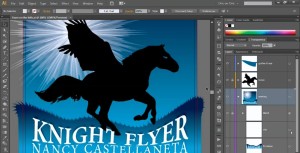
36 - Opacity Masks
36-1 Black conceals, white reveals
36-2 Introducing opacity masks
36-3 Assigning an empty opacity mask to a layer
36-4 Drawing inside an opacity mask
36-5 Fading artwork with a gradient opacity mask
36-6 Nesting one opacity mask inside another
Kursus Adobe Illustrator Jogja 39

37 - Liquify and Envelope
37-1 Two ways to apply free-form distortions
37-2 Introducing the Warp tool
37-3 Brush size, Detail, and Simplify
37-4 Liquifying an isolated portion of a path
37-5 The Twirl, Pucker, and Bloat tools
37-6 The Scallop, Crystallize, and Wrinkle tools
37-7 Simplifying a path; creating a custom starburst
37-8 Applying an envelope-style distortion
37-9 Editing the contents of an envelope
37-10 Masking the contents of an entire layer

Kursus Adobe Illustrator Jogja 40

38 - Pattern Brushes
38-1 Up to five tiles per pattern brush
38-2 Creating a basic pattern brush
38-3 Correcting and adjusting a pattern brush
38-4 Designing a matching corner tile
38-5 Adding an angled loop to a corner design
38-6 Creating end tiles and tile perimeters
38-7 Cropping your designs inside your tiles
38-8 Assembling a seamless pattern brush
38-9 Adding a white buffer zone to a pattern brush
38-10 Reconciling very acute corners in a path
Kursus Adobe Illustrator Jogja 41

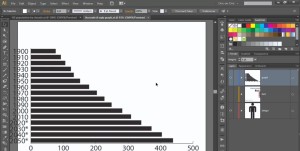
39 - Charts and Pictographs
39-1 The pleasures and pitfalls of graphs
39-2 Importing and graphing numerical data
39-3 Modifying data to create a category axis
39-4 Reformatting text and values in a graph
39-5 Changing the Graph Type settings
39-6 Creating and applying a graph design
39-7 Repairing a broken pictograph
39-8 Recreating a graph at the proper size

Kursus Adobe Illustrator Jogja 42

40 - 3D Effects
40-1 The five advantages to 3D in Illustrator
40-2 Introducing the three kinds of 3D in Illustrator
40-3 Working in 3D space - Pitch, yaw, and roll
40-4 Lighting and shading a 3D object
40-5 Beveling the edges of a 3D extrusion
40-6 Creating live, editable 3D type
40-7 Adding cast shadows to 3D type
40-8 Assigning and editing a 3D Revolve effect
40-9 Mapping artwork onto a 3D object

Segera Hub :Jogja Multimedia
Jl. Magelang KM 7,5 Yogyakarta
HP : 0877.3887.5400
WA : 0877.3887.5400

Pin BB : 5229B9B9
website : www.jogjacourse.com
website : www.jogjacourse.net
website : www.jogjalearn.com
website : www.jogjalearn.net